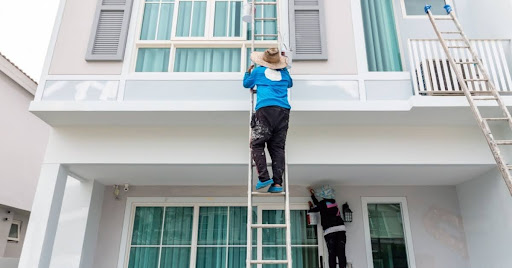
Repainting your house isn’t just about making it look shiny and new; it’s like giving your place a suit of armor, keeping the weather out, bumping up the value, and yeah, your neighbors might get jealous. If your current paint job’s flaking off like bad sunburn or just screaming “I was big in the ‘90s!”, bringing in the pros is the move. They know what’s up, and your exterior house painting deserves more than a lazy weekend DIY hack. Never hired painters before? Relax, it’s not rocket science, just a process with a few steps you’ll get the hang of.
Alright, here’s the deal: we’ll tackle the whole process together, from that first coffee chat with your consultant all the way to the grand finale, where you get to inspect the finished product. With professional exterior painting services, there are no surprises, no stress. You’ll know what’s up, what’s next, and you won’t be stuck guessing.
Step 1: The Initial Consultation and Estimate
So here’s how it actually goes down: First thing, somebody from the painting crew shows up at your house, probably wearing a branded shirt or something, ready to eyeball every inch of your place. They poke around and check out all the nicks, dents, and random stuff clinging to the siding.
They will grab their tape measures and scribble some notes. Honestly, it’s like a home inspection but with way less judgment. After that, you check color swatches and look. Dreaming of going full Barbie pink? Or maybe just refreshing that “builder’s beige” you’ve been stuck with since ’98? This is when you spill all your paint dreams and confess how much you are actually willing to spend, because nobody’s got an unlimited budget.
Step 2: Surface Cleaning and Preparation
You give the thumbs-up on the estimate and pick a date, the crew rolls up and starts getting their hands dirty with the prep work. Honestly, this part is somewhat underrated. People skip straight to dreaming about colors and fresh walls, but prepping the surface is where the magic and the headaches really happen. You want your house to look fresh for the long haul? Don’t skimp on the prep for exterior home painting, trust me.
So first off, the crew shows up and basically blasts the outside with either a pressure washer or just good old-fashioned elbow grease and some sudsy water. They have to get all that crud, pollen, random mildew blobs, and any sad, peeling interior paint colors out of there. Once it dries, they jump in to fix whatever’s busted, cracks, random holes, pieces of rotted-out wood, you name it. Usually, there’s this satisfying part where they squeeze caulk all around the windows and doors, sealing up all those annoying little gaps so water doesn’t sneak in and start chaos.
Step 3: Protecting Your Property
Before anyone even cracks open a paint can, the crew’s running around like a tactical SWAT team for your yard. Plants are covered, windows are taped up tighter, lights, and walkways are covered too. They whip out drop cloths, throw around plastic like it’s some Pampered Chef party, and painter’s tape ends up everywhere except maybe on the neighbor’s cat. Oh, and that patio furniture you never use? They will haul it out of the blast zone or tarp it like it’s about to rain actual paint. No splatters on your gnome collection.
Step 4: Priming the Surface
Honestly, many people don’t even realize priming isn’t just some extra step, and it’s critical if you want your paint job to look halfway decent. You slap on primer, and suddenly that bright red wall isn’t bleeding through your new calming sage green. It kinda acts like a shield, right? Seals up whatever’s underneath, gives the paint something to grip onto, and makes sure you’re not left staring at uneven patches everywhere. Especially when you’re covering wild colors or just bare wood, it’s a total must. Skipping it could be a rookie mistake.
Step 5: Applying the Exterior Paint
The real fun begins with painting time. Imagine your team grabs their brushes and starts layering on that good stuff, the high-end paint picked for not peeling after, like, a single winter. They’re not fooling around, either. Maybe they go for classic acrylic latex if you’ve got siding, or elastomeric paint if your place is rocking the stucco look, or even some niche pro-level paint if we’re talking metal or bricks. The whole point? Color stays fresh, your walls don’t start flaking mid-summer, and the house basically starts flexing in the neighborhood.
Step 6: Detail Work and Second Coats
So after the crew tackles the big stuff, they dive into the finicky little details: think trim, doors, shutters, railings, all that jazz. Here’s where things get a bit fancy. You might need a totally different color or switch up the finish, like going for that slick semi-gloss look on your trim. And honestly, even just adding a pop of loud color on the front door can turn your place from “meh” to “hey, check that out!” It’s wild how those tiny tweaks end up stealing the show when it comes to curb appeal.
Step 7: Cleanup and Final Inspection
Alright, once the painting’s done, the crew’s not just gonna bail. They will yank down all the drop cloths, toss any leftover junk, and honestly, probably leave the place looking better than it started. There’s always that one guy squinting at the walls, hunting for spots he missed, so if there’s even a tiny smudge, they’ll fix it. Then they’ll walk through everything with you, just to make sure you’re actually happy and not secretly plotting revenge over a rogue paint drip.
Conclusion
If you want your house to actually look like someone cares about it, and not just survive another winter covered in peeling paint, dropping some cash on pro exterior painting is a no-brainer.
And if you go with someone legit, like NJ Painting Services, you’re not just adding on some fancy new color, you’re buying yourself some relaxation, knowing your house is protected, looks sharp, and, honestly, probably making the neighbors a little jealous.